
The LACMA team is working together from our respective homes to bring you interesting content and creative activities while the museum is temporarily closed to the public. We may not be able to gather together, but we can still create something beautiful.
Discover how to combine the precise line work of pen-and-ink with the expressive and lively qualities of watercolor! Being skilled at drawing is not a requirement. The more you draw at the level you’re at, the more authentic the work will be!
From greeting cards to children’s books to logo designs, combining pen and ink with watercolor has long been a favorite method of artists both for how easily it can be applied and how quickly one can create a finished piece.
Gather Your Materials
Supplies:
- Watercolor paints (a simple kit with 5–8 colors is fine)
- Brush, size 8 or 10 (a “round” brush or the one that comes with your kit will work)
- Pencil
- Eraser
- 1 waterproof black fine liner pen is recommended (Fine permanent markers work too!)
- Watercolor paper, 8”x10” size or larger (As an alternative, drawing paper can be used, but it will curl up when it gets wet. Tape the paper to a flat surface before putting water on it.)
- Piece of test paper
- Artist or painter’s masking tape
- Mixing tray (this can be the lid of the watercolor kit or a small plate)
- 1 paper towel
- 1 cup for water
Before we get started...
Warm up!
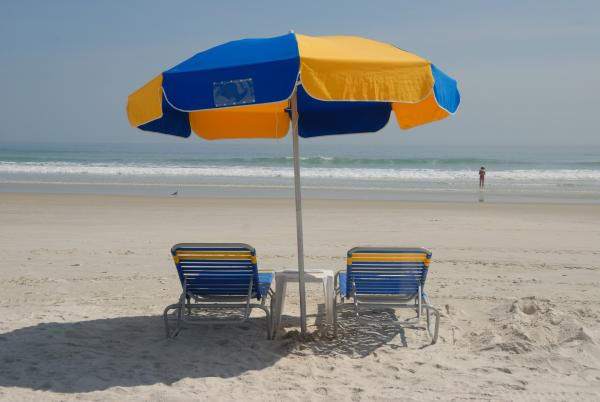
Using pencil on your test paper, draw the simple composition of beach, ocean, sky, and umbrella in the picture above. Keep a light touch with your pencil—you don’t want too much of the graphite powder to mix with your paint, making your colors appear gray.
You can also print the beach scene out first and trace over it. That’s a good way to get warmed up for your actual drawing.
Think in layers.
When you get to the painting steps of the exercise, paint one or two colors at a time, let them dry, clean your brush and mixing area, then go to the next layer and apply the next color. Not all “layers” actually overlap, but it’s still best to approach them as if they might.
Keep your water and paints clean.
Two things sneak up on you when you work with watercolor:
- Your color cake gets other colors on it, and
- Your water is too dark and starts to muck up your next color.
If you plan ahead to keep them pure, you’ll get better control over your color.
You can blot.
Consider your paper towel (or any white piece of absorbent material) as your second brush—it’s there to help you control how much water or paint you want after you’ve applied it to the surface.
Go lightly.
Paint a little bit lighter than you might want—you can enhance your colors once they’re dry with colored pencils or a small amount of watercolor. Painting lightly will help you learn better how to control your colors.
Let’s begin!
For this exercise, we will continue to use the beach photo above. Once you get comfortable with the process and techniques, use your imagination or scenes from your daily life for inspiration.
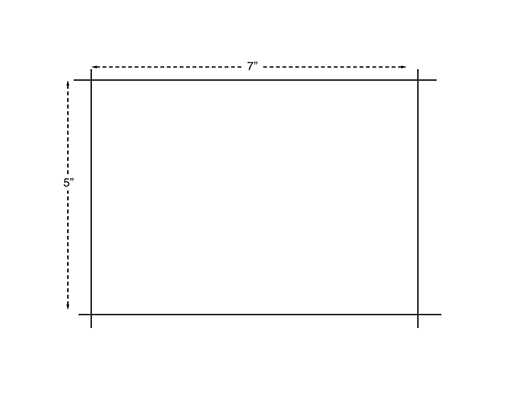
Create a frame for your scene.
Draw a rectangle roughly 7 inches wide by 5 inches high. It doesn’t have to be exact.
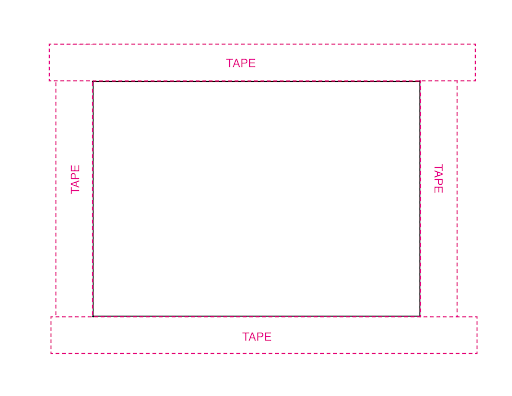
Tape it.
Lay tape down along the edges of your image area. This will keep your paint contained within the frame. Apply just enough pressure to the tape to make it seal the edges, but not so much it tears your paper when it’s time to remove it later. Artist tape (or masking tape) is recommended. Cellophane tape (packing tape) doesn’t work.
Tape your paper to a flat surface to prevent it from curling when the watercolor is applied. If you can’t tape it down, that’s okay too.
_1.jpg)
Draw.
Draw the beach scene to fit into the rectangle.
Tip: Draw very lightly with your pencil (just enough to see the image). Being able to draw well is not a concern here—your own style is what gives it character, so be a little “cartoony” if it suits you!
Erase!
When you’ve finished your drawing, remember that watercolors aren’t opaque—your pencil lines will still show after you’ve painted it, so at this point you might want to lighten your drawing with an eraser, leaving only the basic lines you’ll need to see where to apply your colors.
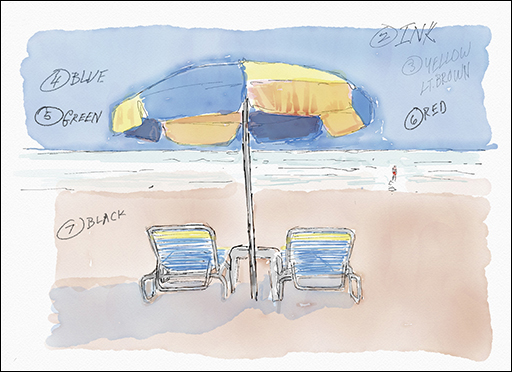
Add Pen and Ink.
You’ll notice circled numbers and colors I’ve left on the painted image to indicate how this sequence was originally created. It might be helpful to you.
_0_0.jpg)
If you have a waterproof ink pen, trace your pencil drawing, allow the ink to dry, then lightly erase the pencil lines as much as possible. Ideally, you should have a simple ink line drawing based on the original photo. If you don’t have a suitable pen, leave your pencil lines.
_0_0.jpg)
Add Watercolor:
Using your wet brush, add a small amount of water to the Yellow cake. Allow the brush to fill with Yellow paint then empty the brush into your mixing tray. Push the brush against the edge of the tray to get the paint off of the brush and into the tray.
Tip: Don’t mix directly onto the clean color cakes in your set—always try to keep your color cakes pure.
Dip your brush into your mixing tray and paint onto your test paper. This will show you how intense your pigment is, and how “loaded” you want your brush to be.
Modify the ratio of paint to water until it looks right to you. Apply the Yellow to the areas indicated.
Tip: Have your paper towel ready to reduce the water on your work if necessary. Blot!
Follow the same technique with the Brown paint. Note that the distant part of the beach is a slightly lighter shade, so add more water to your Brown mix before applying to that area.
You’re now finished with mixing those two pigments. Allow these two colors to dry.
Tip: Clean the mixing trays and brush before moving on to your next colors. If they’re not clean, any previous color left in the trays and your brush will then combine with your next color.
_0_0.jpg)
Apply the Blue in the same manner. Note that your Blue becomes part of the sand color to create the shadow for your umbrella, and that the Blue is slightly darker on the umbrella and chairs. You can get a darker Blue in both the umbrella and the chairs by painting it twice with your pre-mixed Blue, or you could mix a separate, darker Blue if you just want to paint one layer in those sections.
Let the Blue dry, and remember to clean the tray...again.
Apply a light green to the area where the water meets the sand. Note that you’ll be painting over the Brown in some areas.
-2_0_0.jpg)
Add Red to the areas inside the umbrella, to the folds of the outer umbrella, and to the swim trunks in the distance (the trunks should be a more vivid Red).
Using Black, make a light Gray for the umbrella pole and the chair frames.
Keep practicing!
After you’ve completed this lesson, you might want to repeat it. Create the exact same painting, in the exact same order, but remember everything you wish you could have a “do-over” on.
Look at artists in LACMA’s collection who can inspire you to continue working in watercolor and ink. Then consider how many images you could make from your own imagination and drawing style!
We would love to see your artwork! Post your creation to social media and tag @lacma.