

A "camera obscura" sounds fancy, but making one is actually pretty easy and the technology it uses is quite simple.
First, fun facts:
- Photography wouldn't exist without it.
- Scientists and artists have been using them for thousands of years.
- It means "dark chamber" in Latin.
- They can be as large as a room or small enough to fit in your hand.
How a camera obscura works:
Imagine a dark room with a window. Light from outside travels through a tiny hole in the curtain, projecting the outside image on a wall in the room. The image appears upside down and in reverse because when the light enters the tiny hole, the light rays intersect.
This project will show you how to make a handheld camera obscura using basic materials from around the house and a few great ways to use it.
I was inspired by the exhibition Vera Lutter: Museum in the Camera to show you how to make a camera obscura. As an artist, it's a tool that I love to experiment with. Vera Lutter was invited by LACMA to work as an artist in residence from February 2017 to January 2019. During that time, she created work looking at the museum's architecture, galleries, and collections by using a room-sized (!) camera obscura. Lutter makes her photographs by allowing light to enter the camera through a tiny pinhole opening. When the light-sensitive photo paper inside the camera is exposed to these light rays, it records an image of the scene in front of the pinhole opening.

Get ready, get set, let's make a camera obscura!
You may want to watch this short film I made for you first.
Gather Supplies:
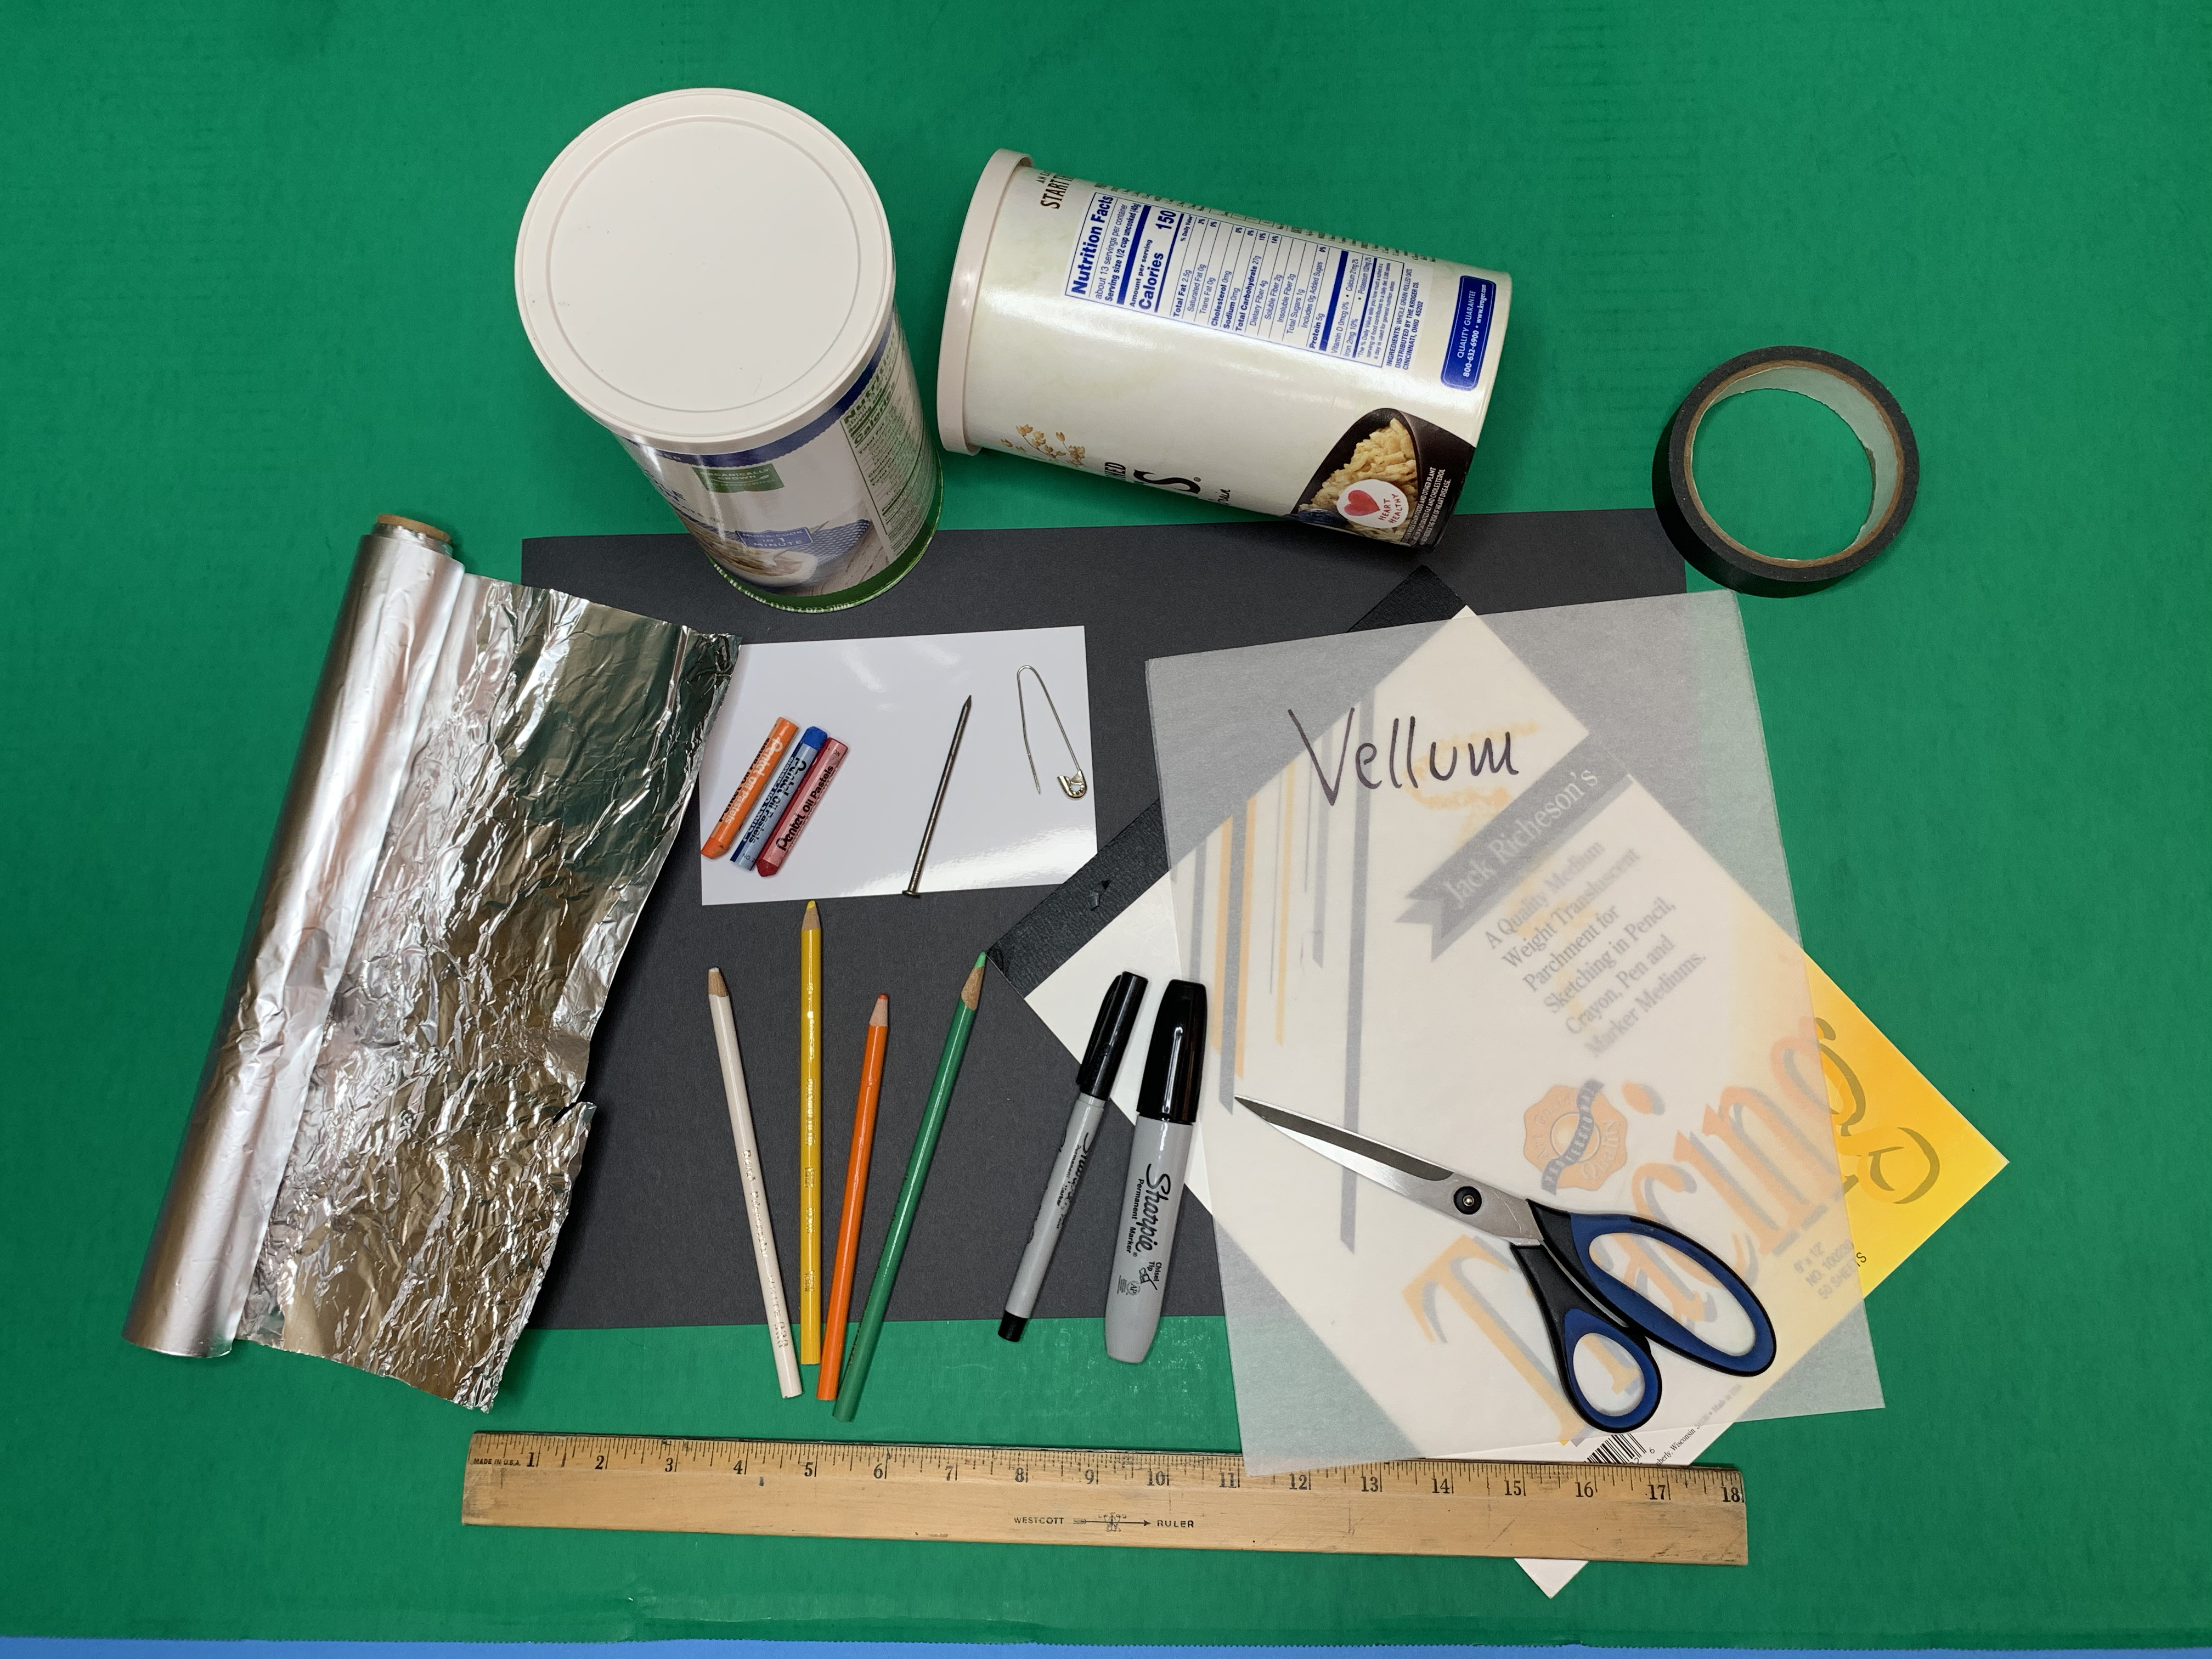
- 2 clean oatmeal containers and their lids
- 1 roll of ¾ inch black masking tape
- 8 ½ x 11 inch vellum translucent paper (works best), or 1 sheet of tracing paper
- Colored pencils: white, yellow, light blue, light green (crayons or metallic pens will also work)
- 1 sheet of 12 x 18 inch black construction paper (maybe one extra for mistakes)
- Ruler
- #2 pencil with eraser
- Scissors
- 3 pieces of aluminum foil (6 x 6 inches approximately)
- 1 extra fine point pen, large safety pin, or finishing nail
Let's Get Started!
Step 1
Empty two oatmeal containers (we will call them tubes) and clean them out.
Step 2
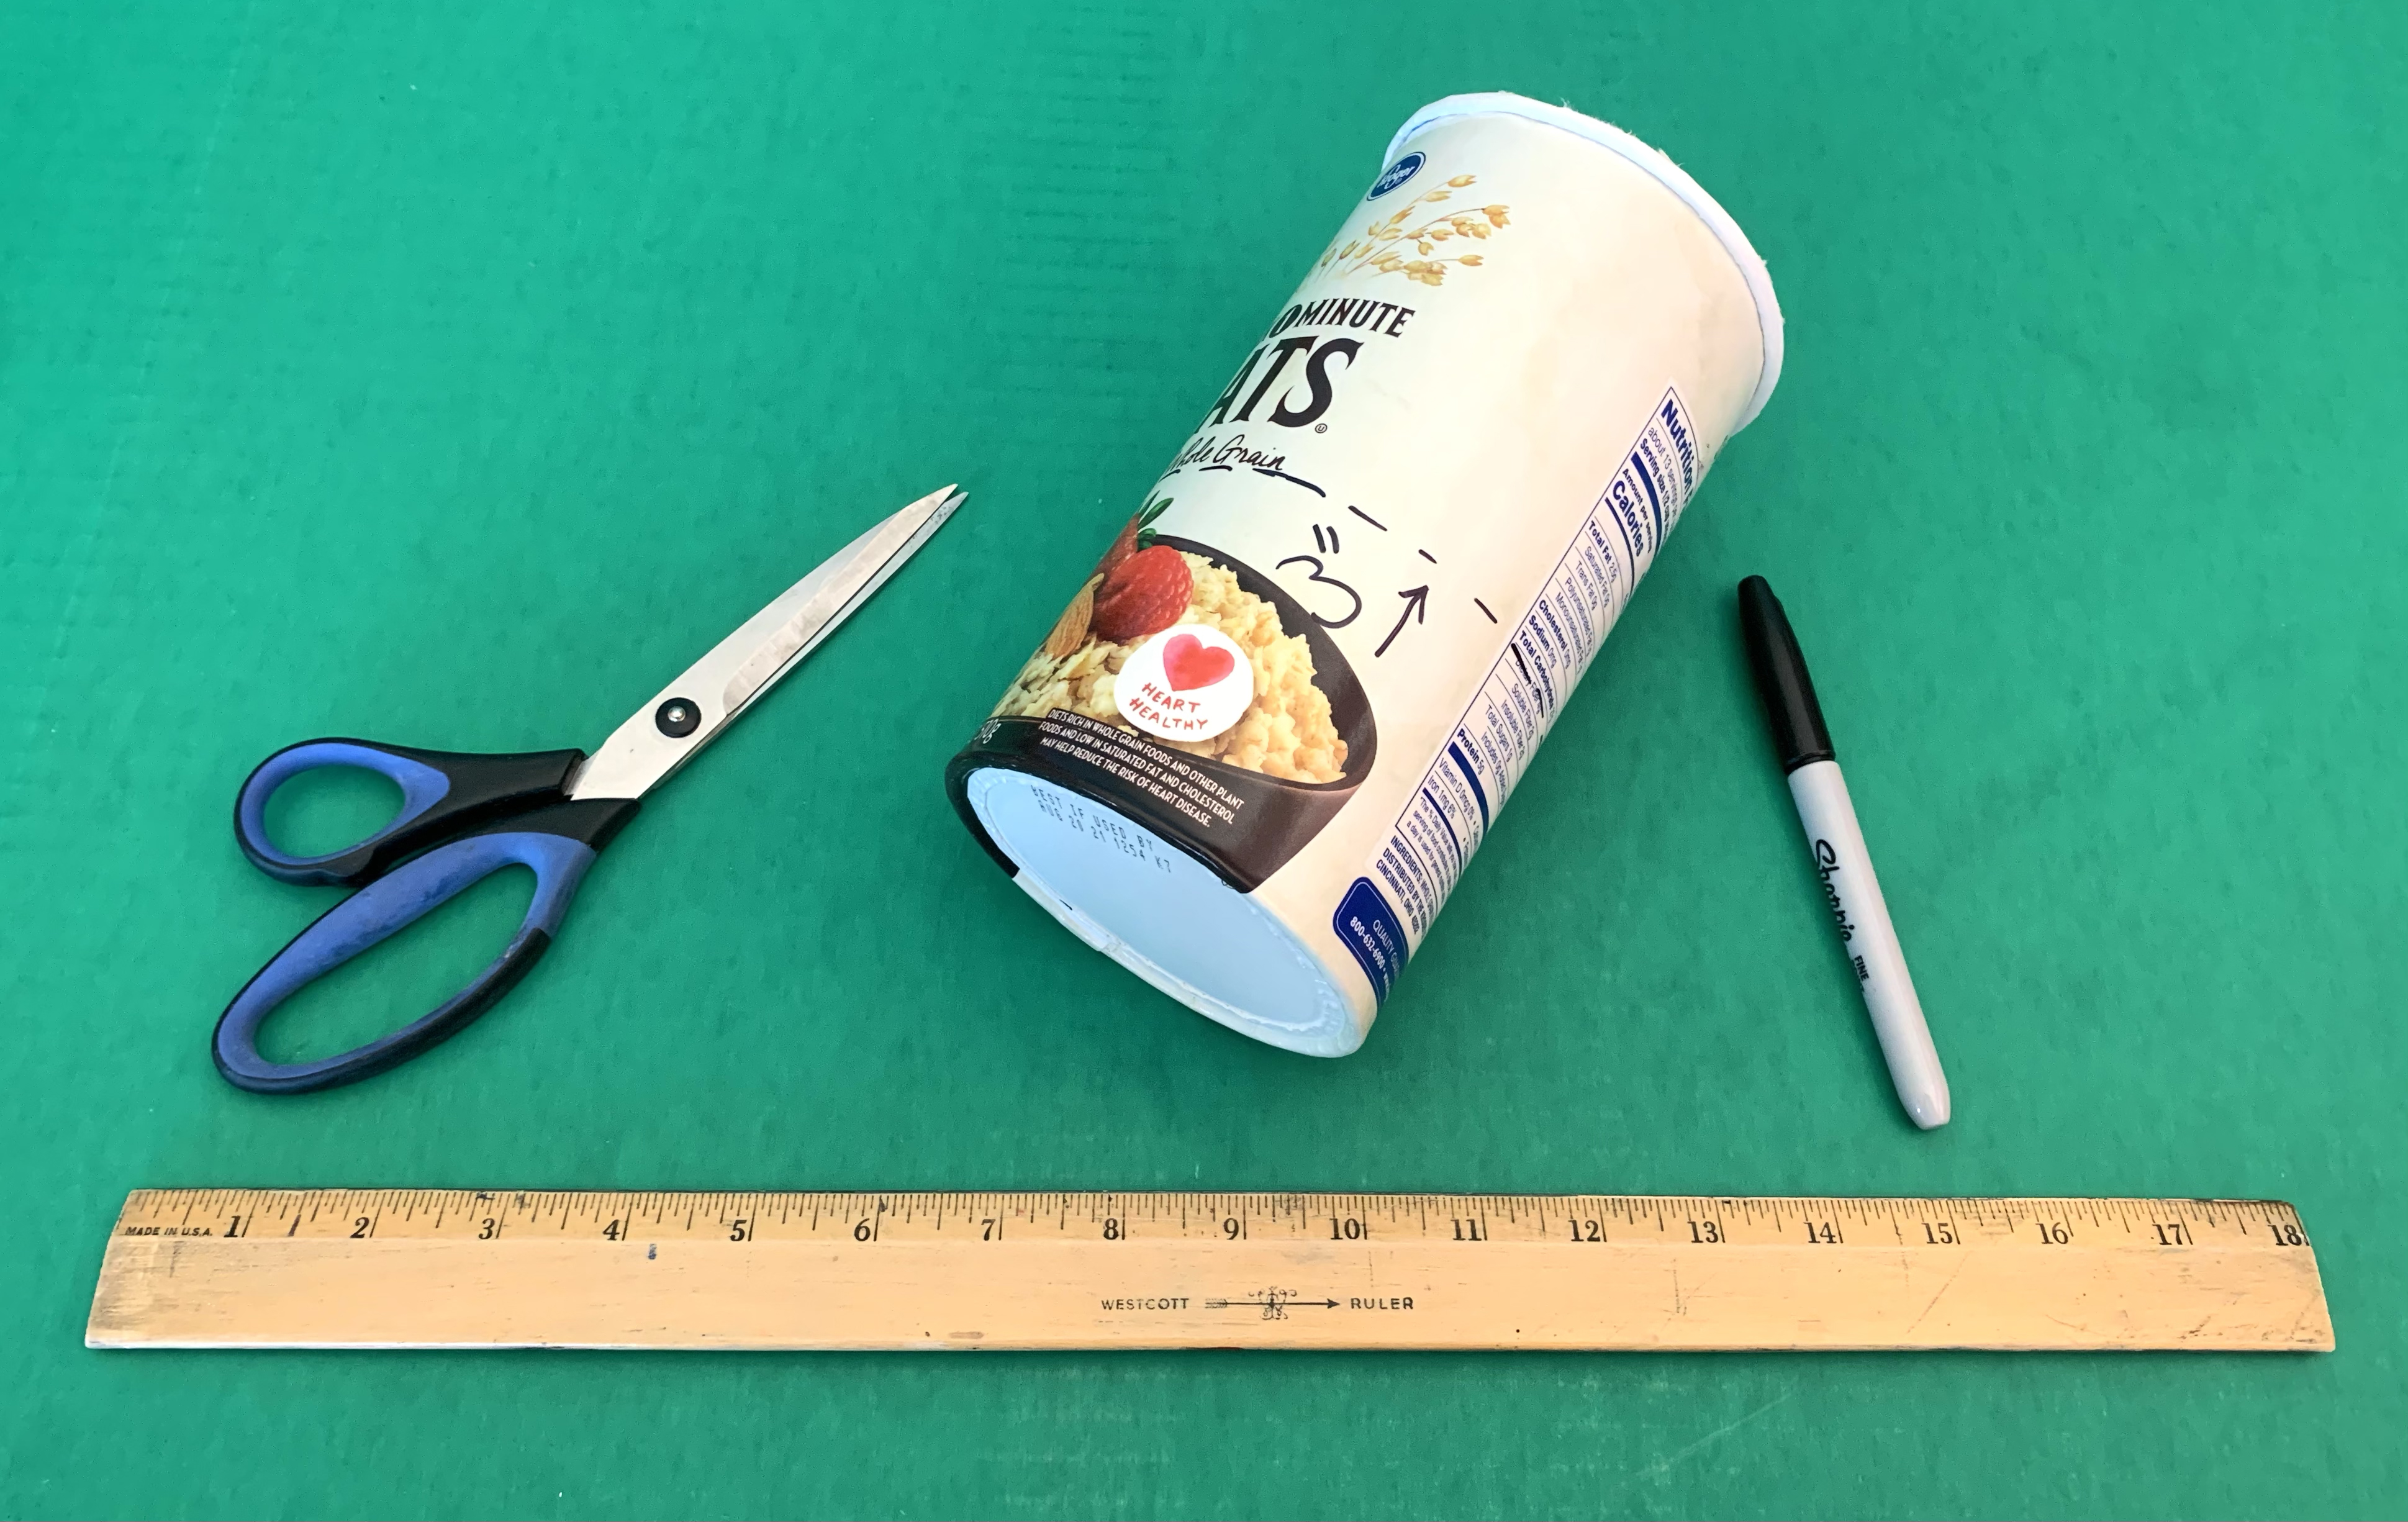
Mark and cut one tube three inches from the solid bottom.
Step 3

Cut a 2 x 2 inch square opening (centered) in the solid bottom of each small and large tube.
Step 4
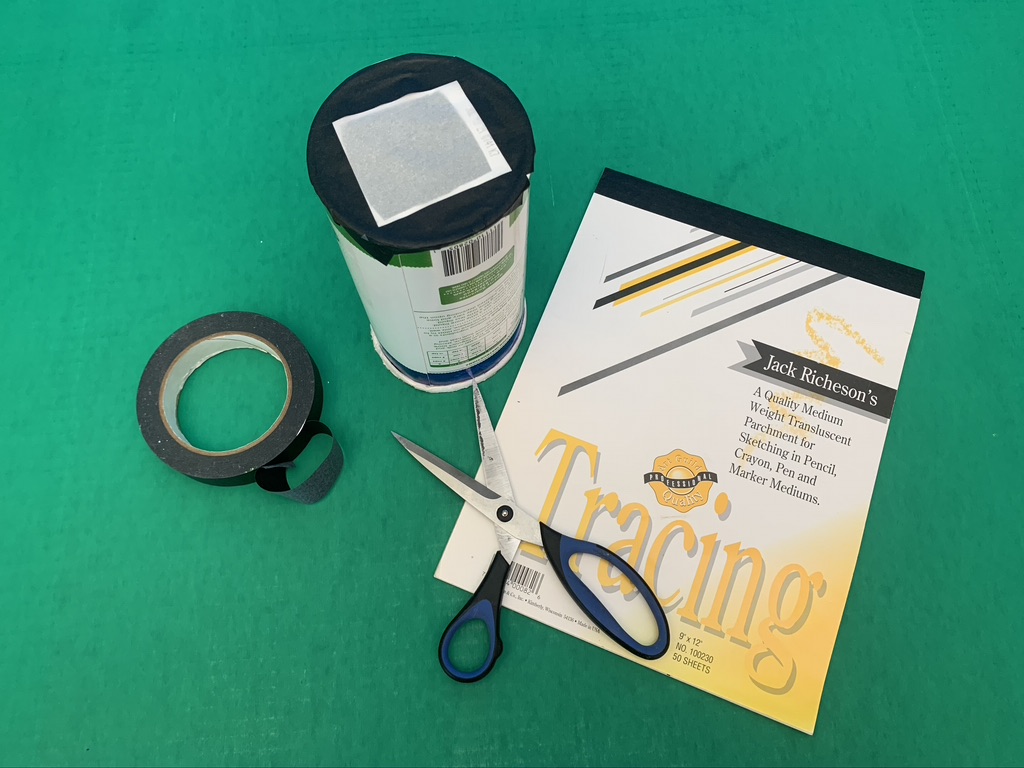
Cut a 2 ½ inch square piece of vellum or tracing paper to cover the square hole on the large tube and use black masking tape to tape the edges of the vellum or tracing paper.
Step 5
Tape together both solid ends of the tubes with black masking tape. (Make sure the square holes line up.)
Step 6
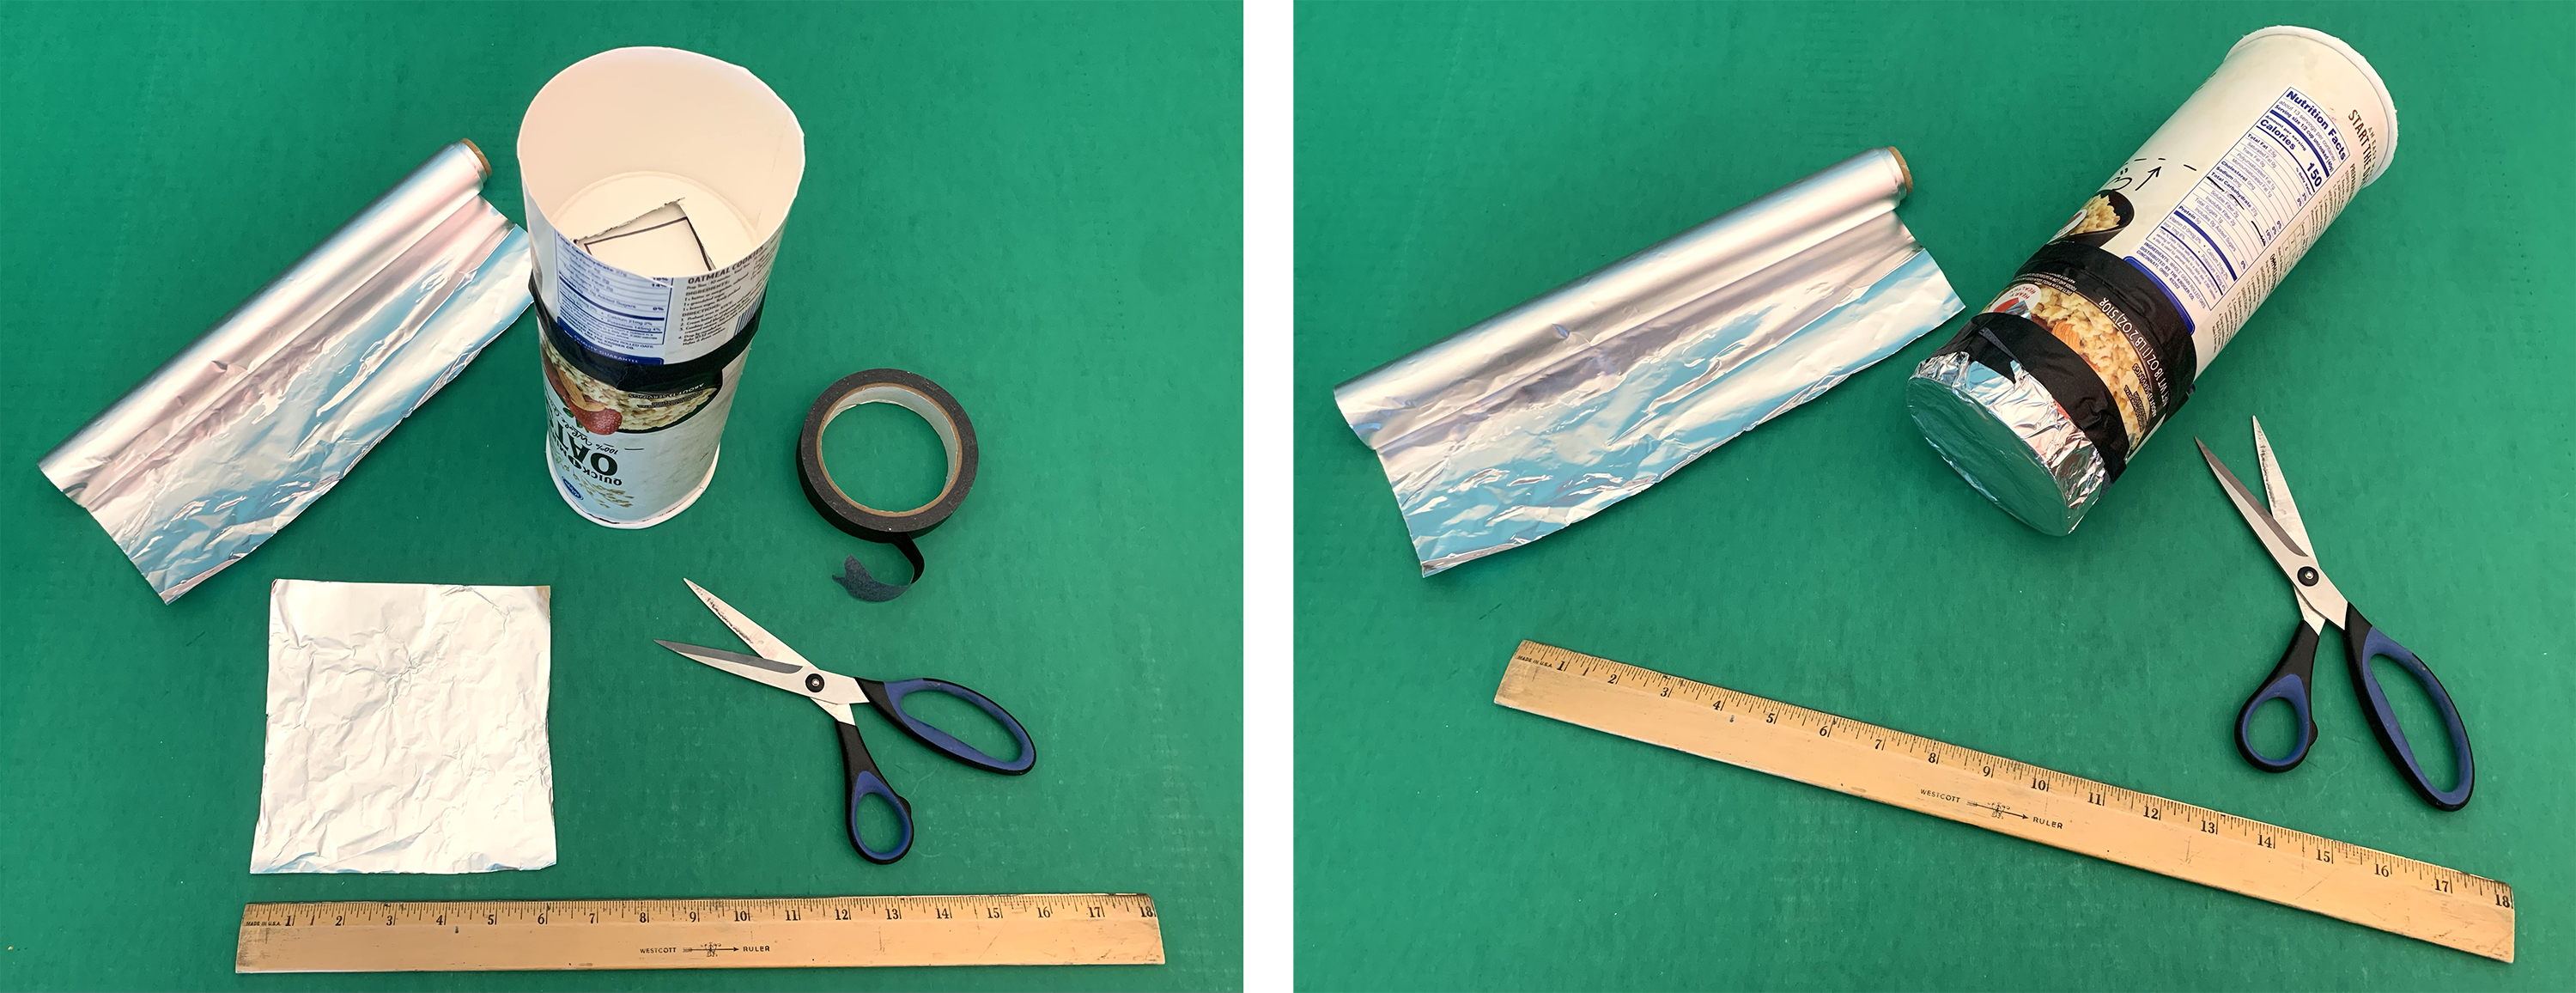
Tape the 6 inch aluminum foil piece over the opening on the shorter end of the tube.
Step 7
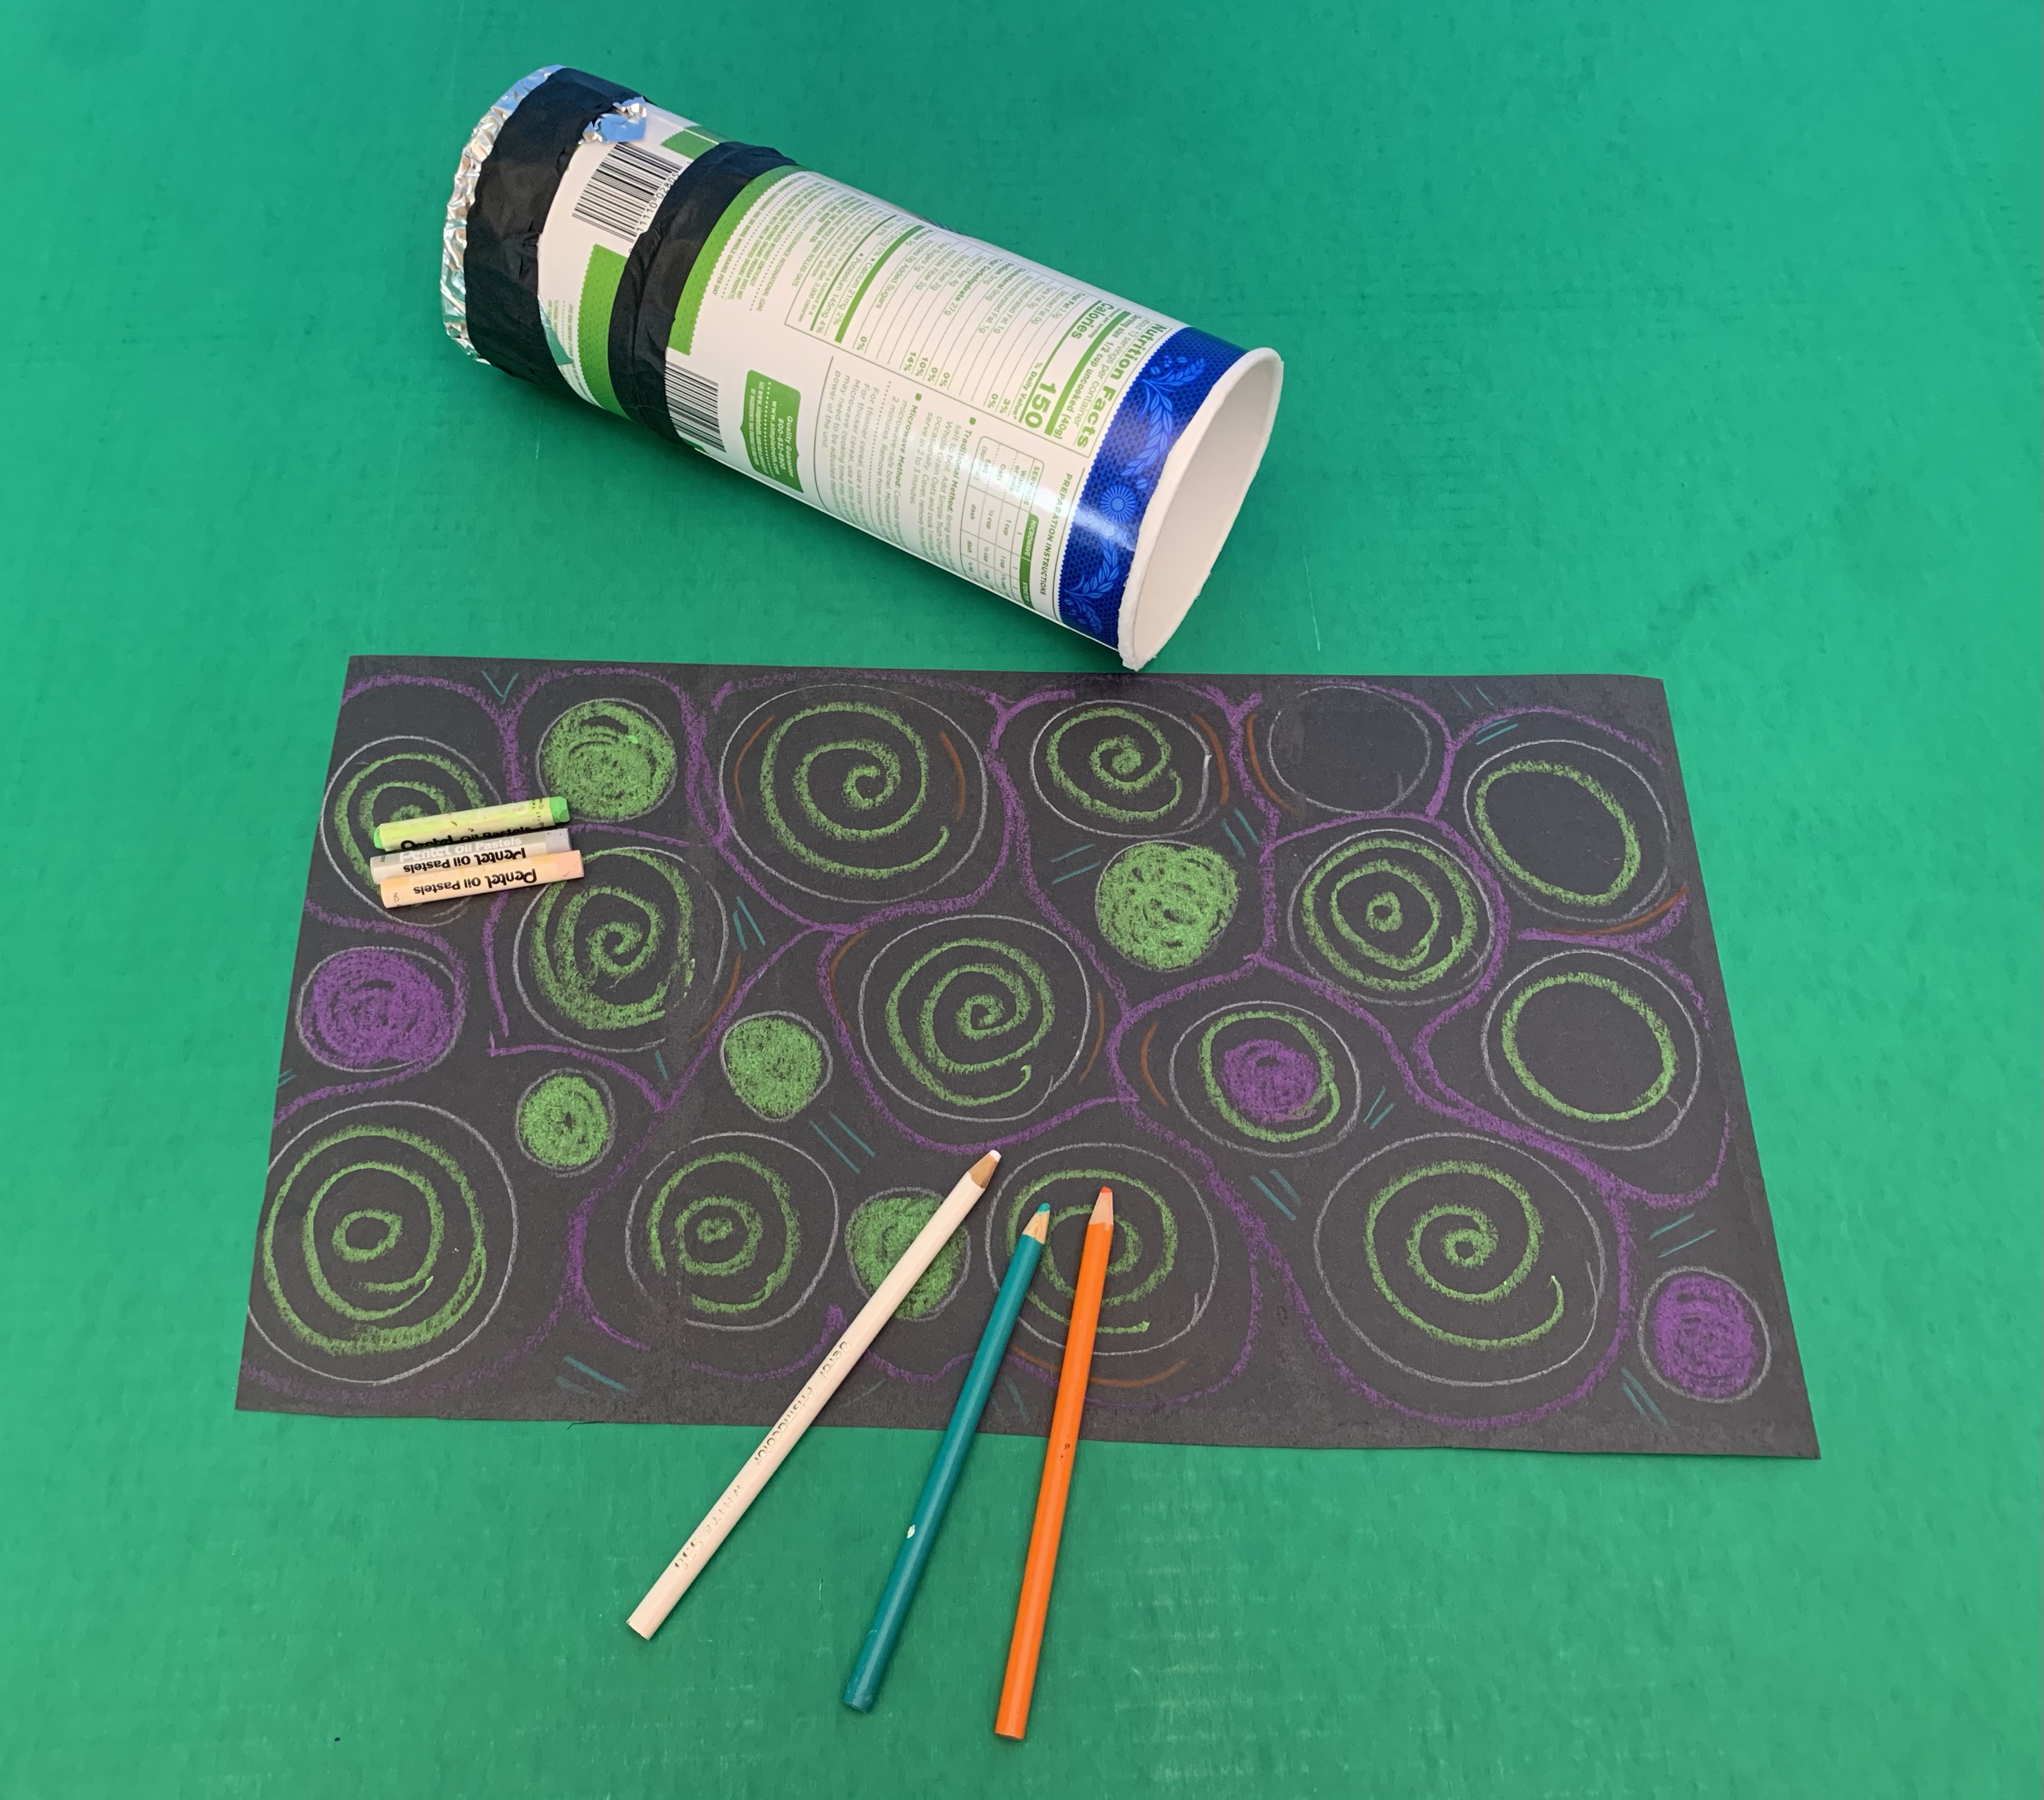
Cut a piece of black construction paper 10 x 18 inches. Decorate one side with color pencils, crayons, or markers. Or all of them!
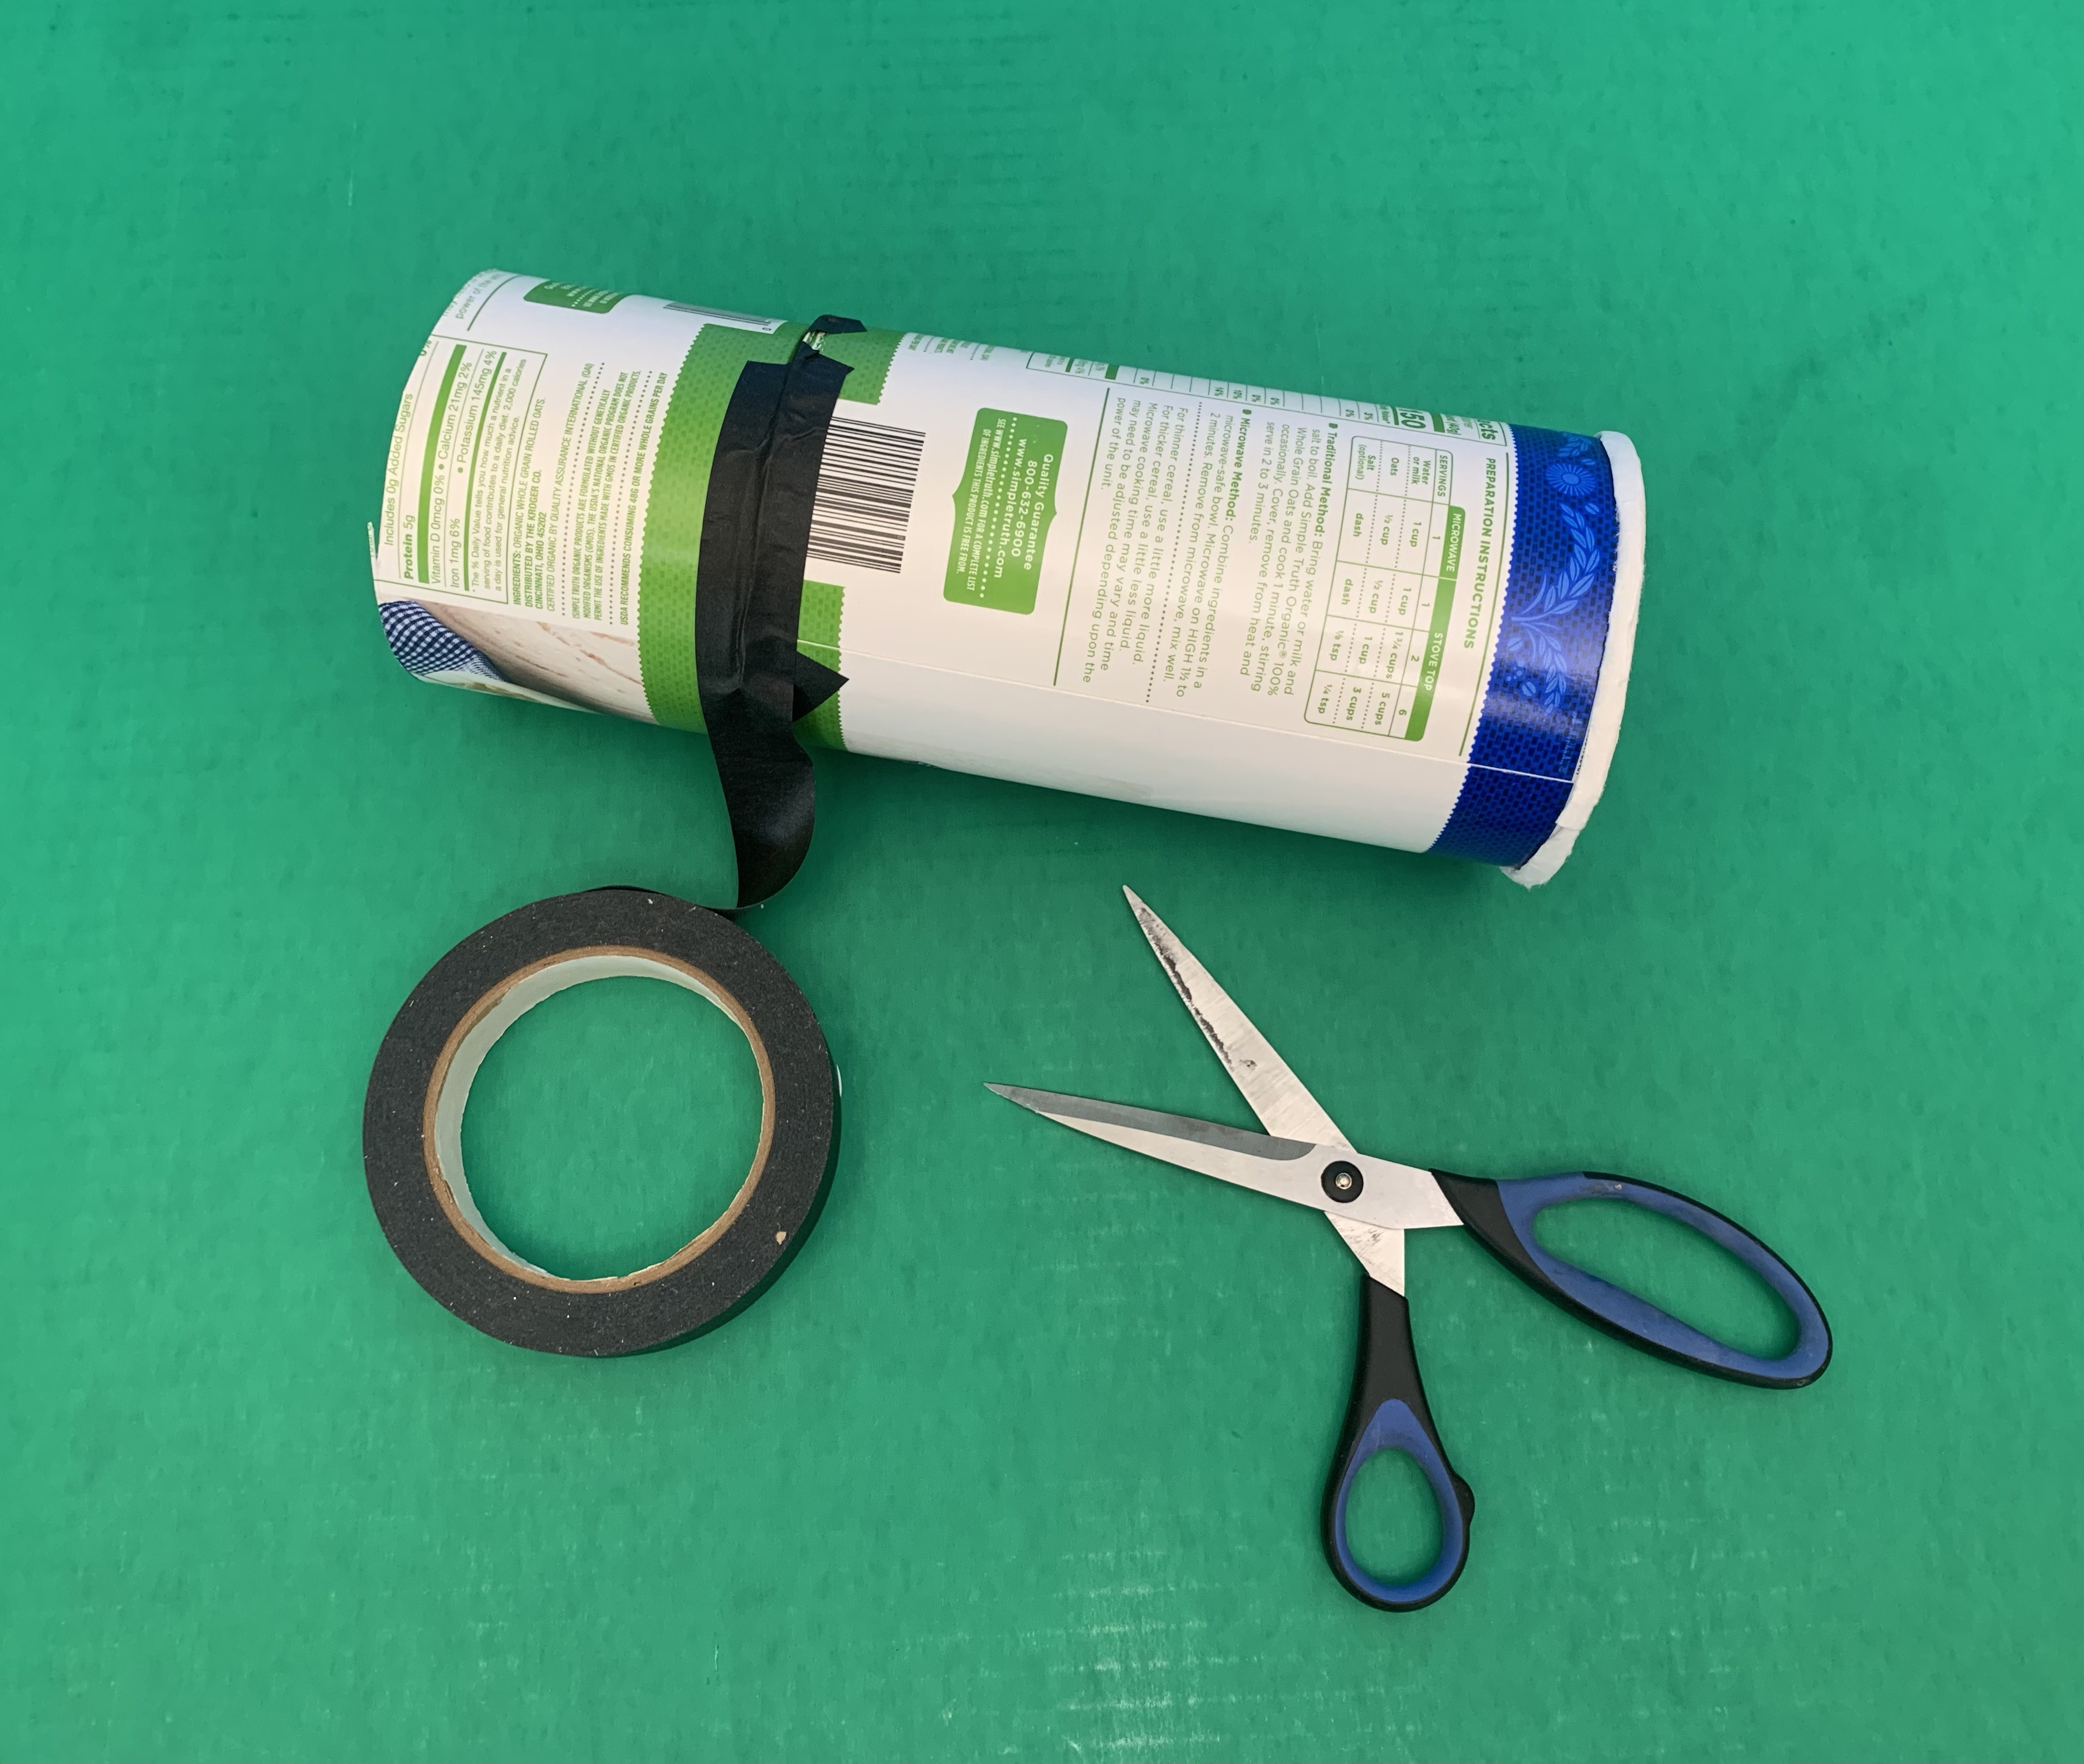
Step 8
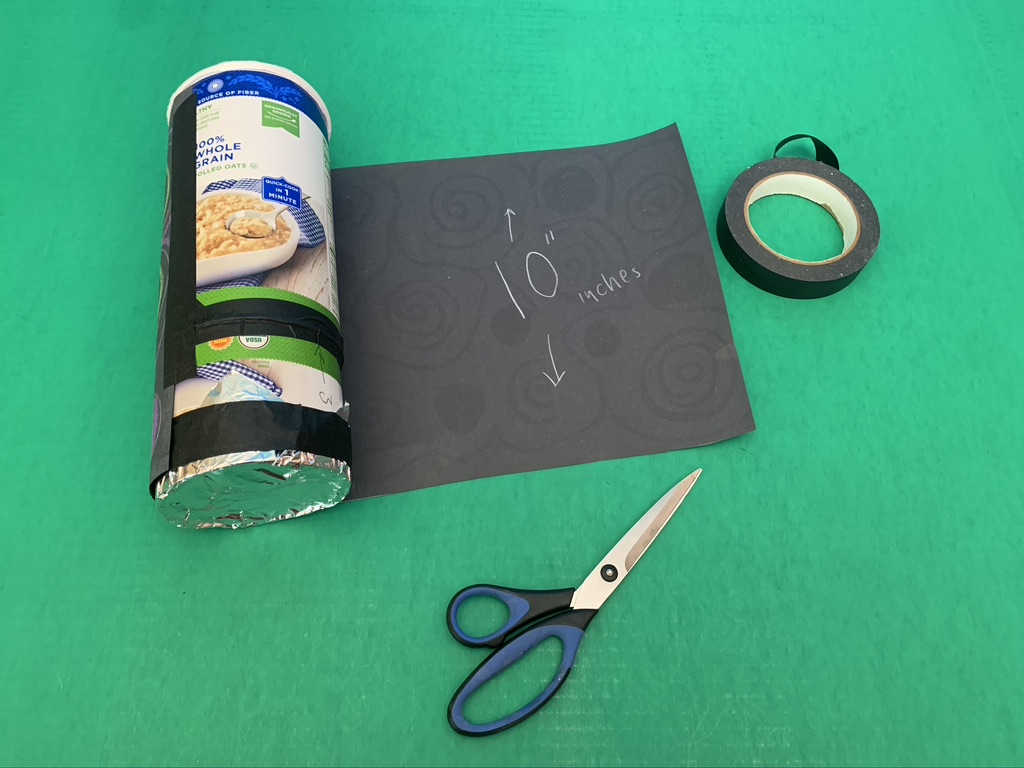
Wrap the decorated construction paper around the tube and tape it with black masking tape.
Step 9
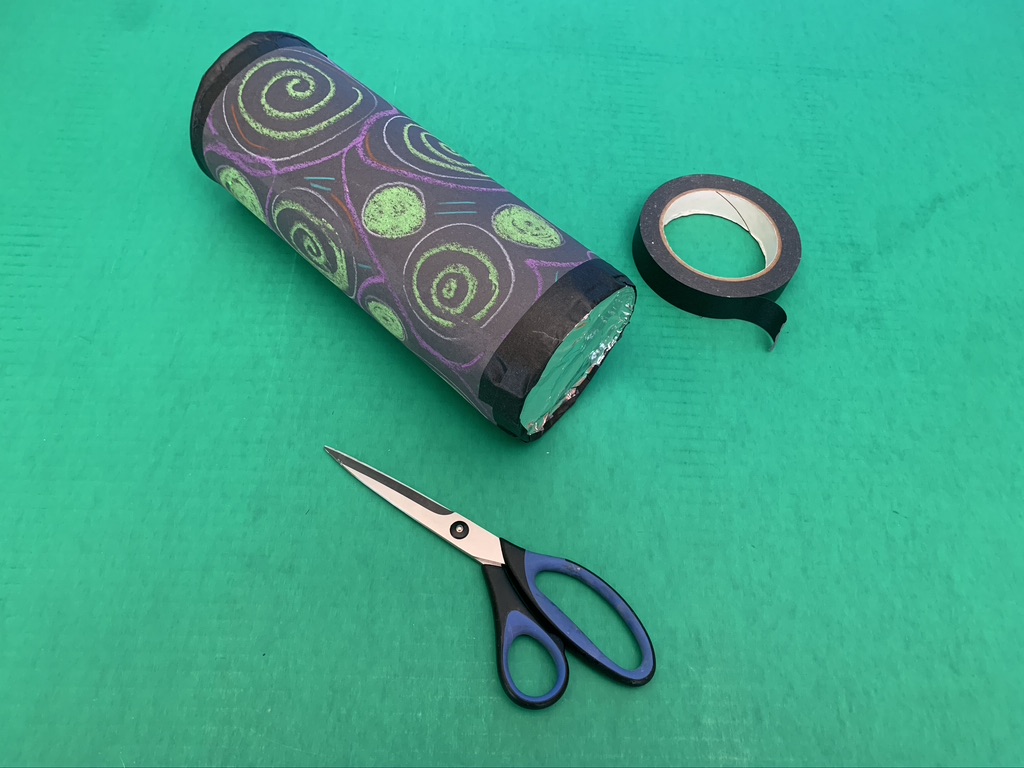
Use black masking tape to tape around the rim of each end of the tube.
Step 10
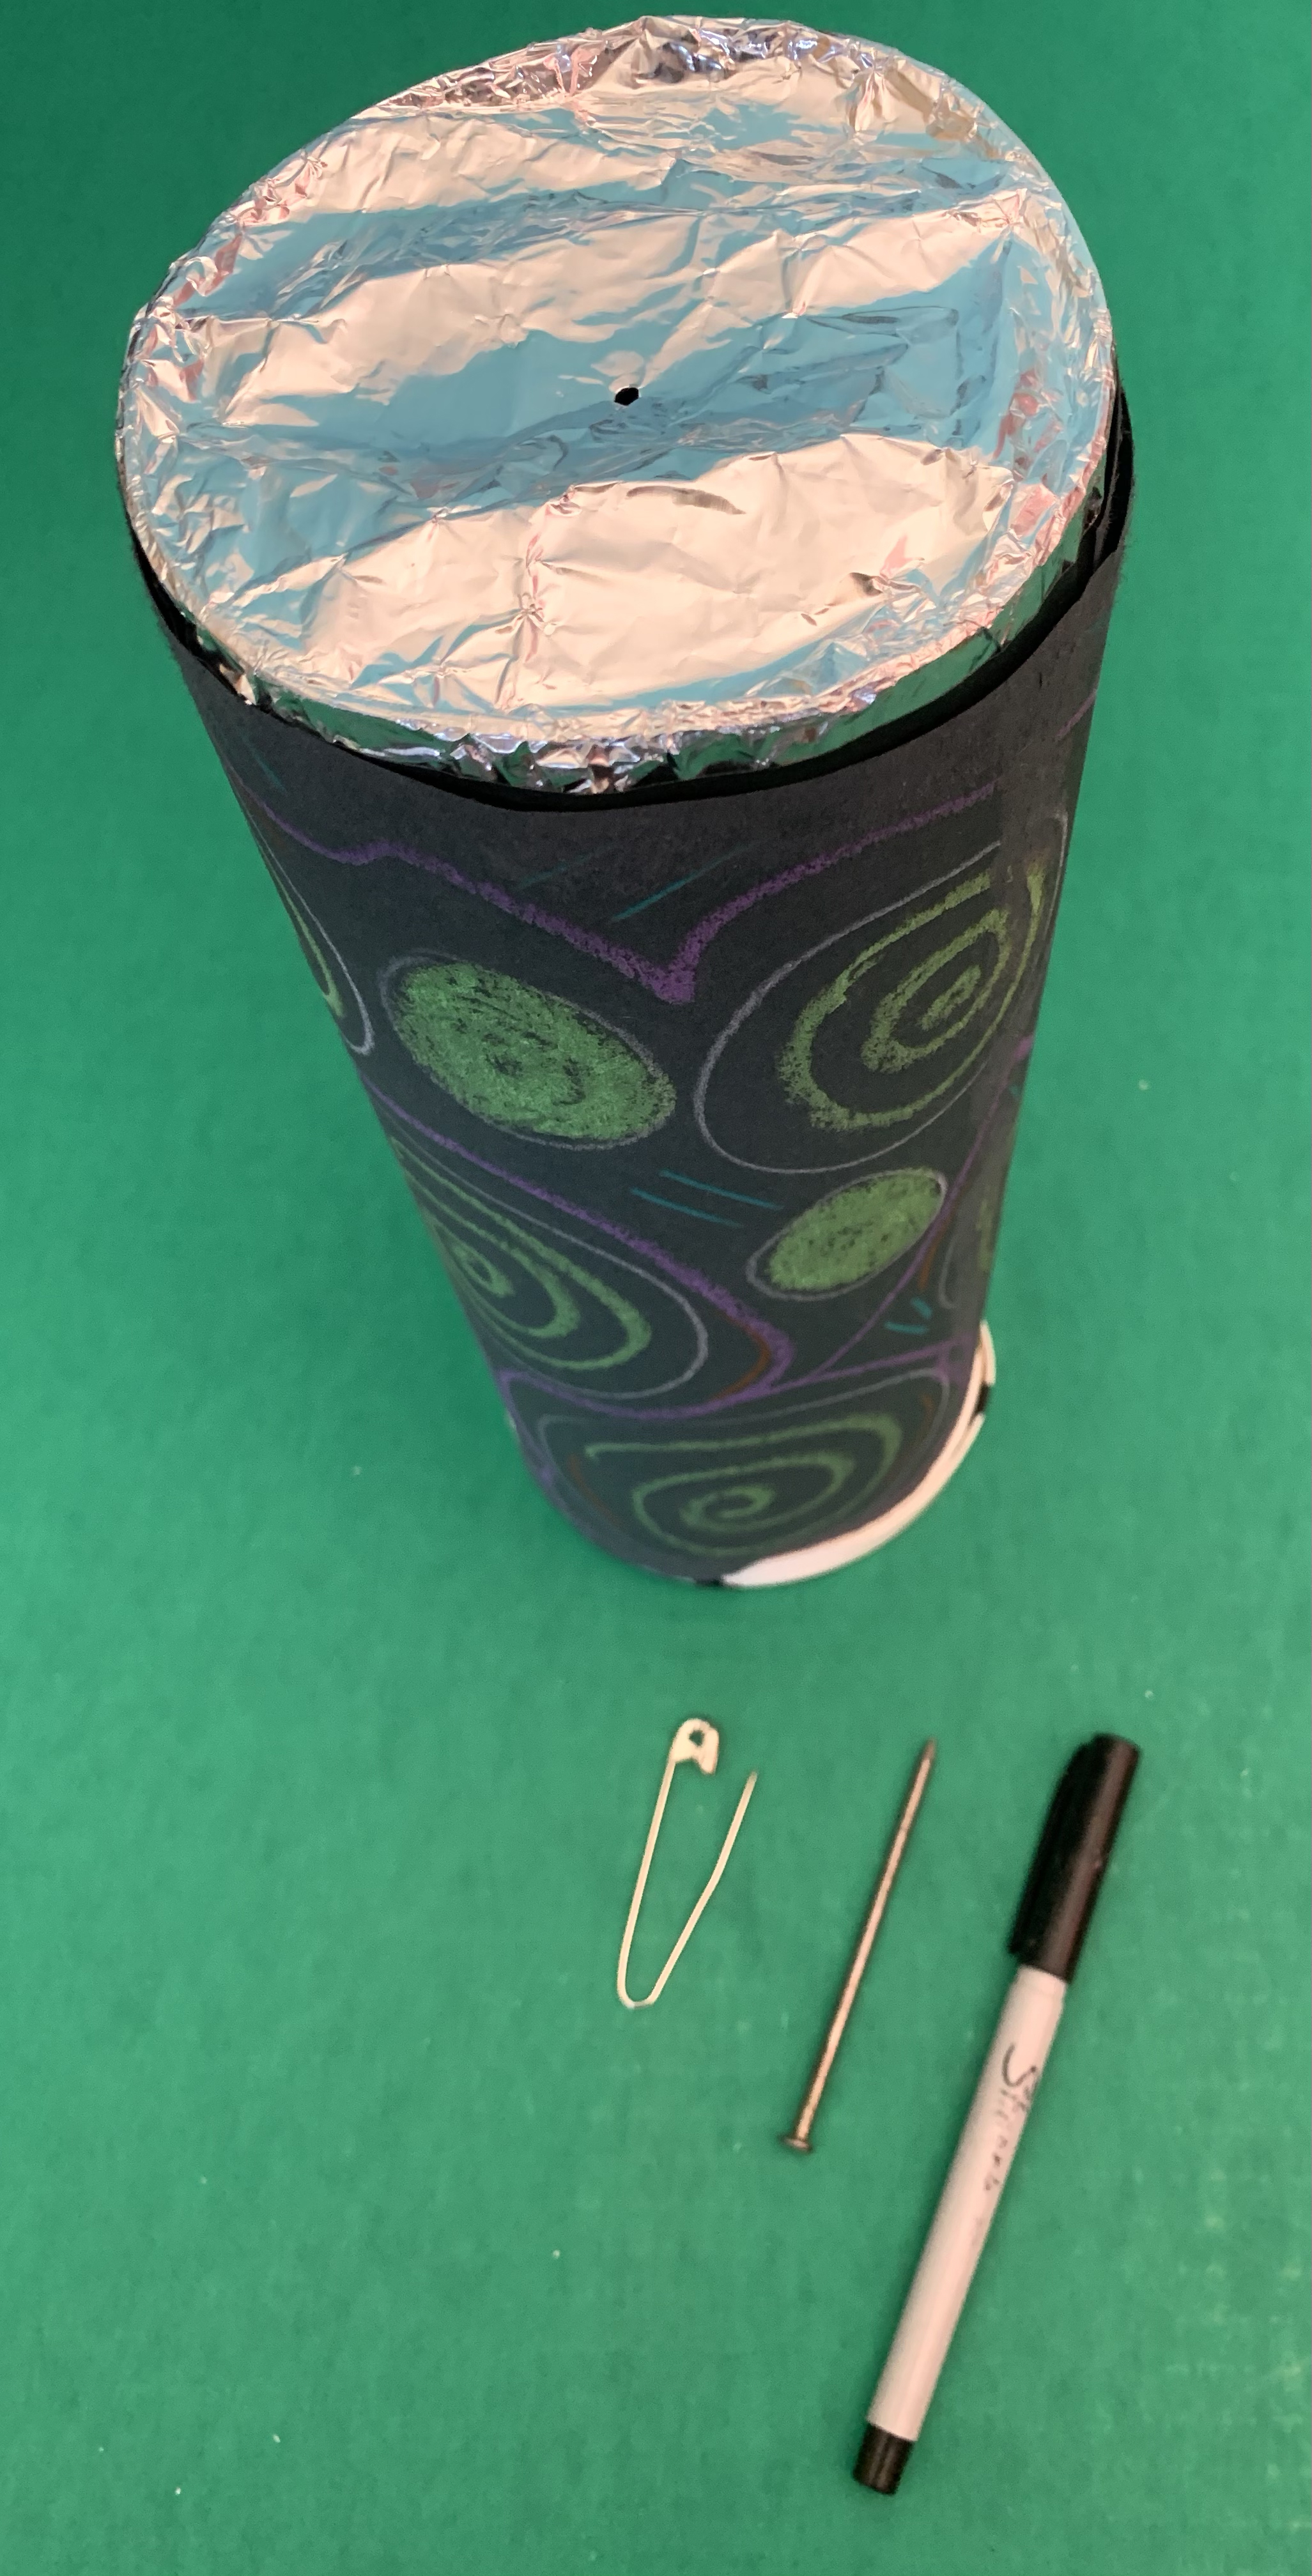
Use an ink pen, safety pin, or finishing nail to poke a small hole in the center of the aluminum foil.
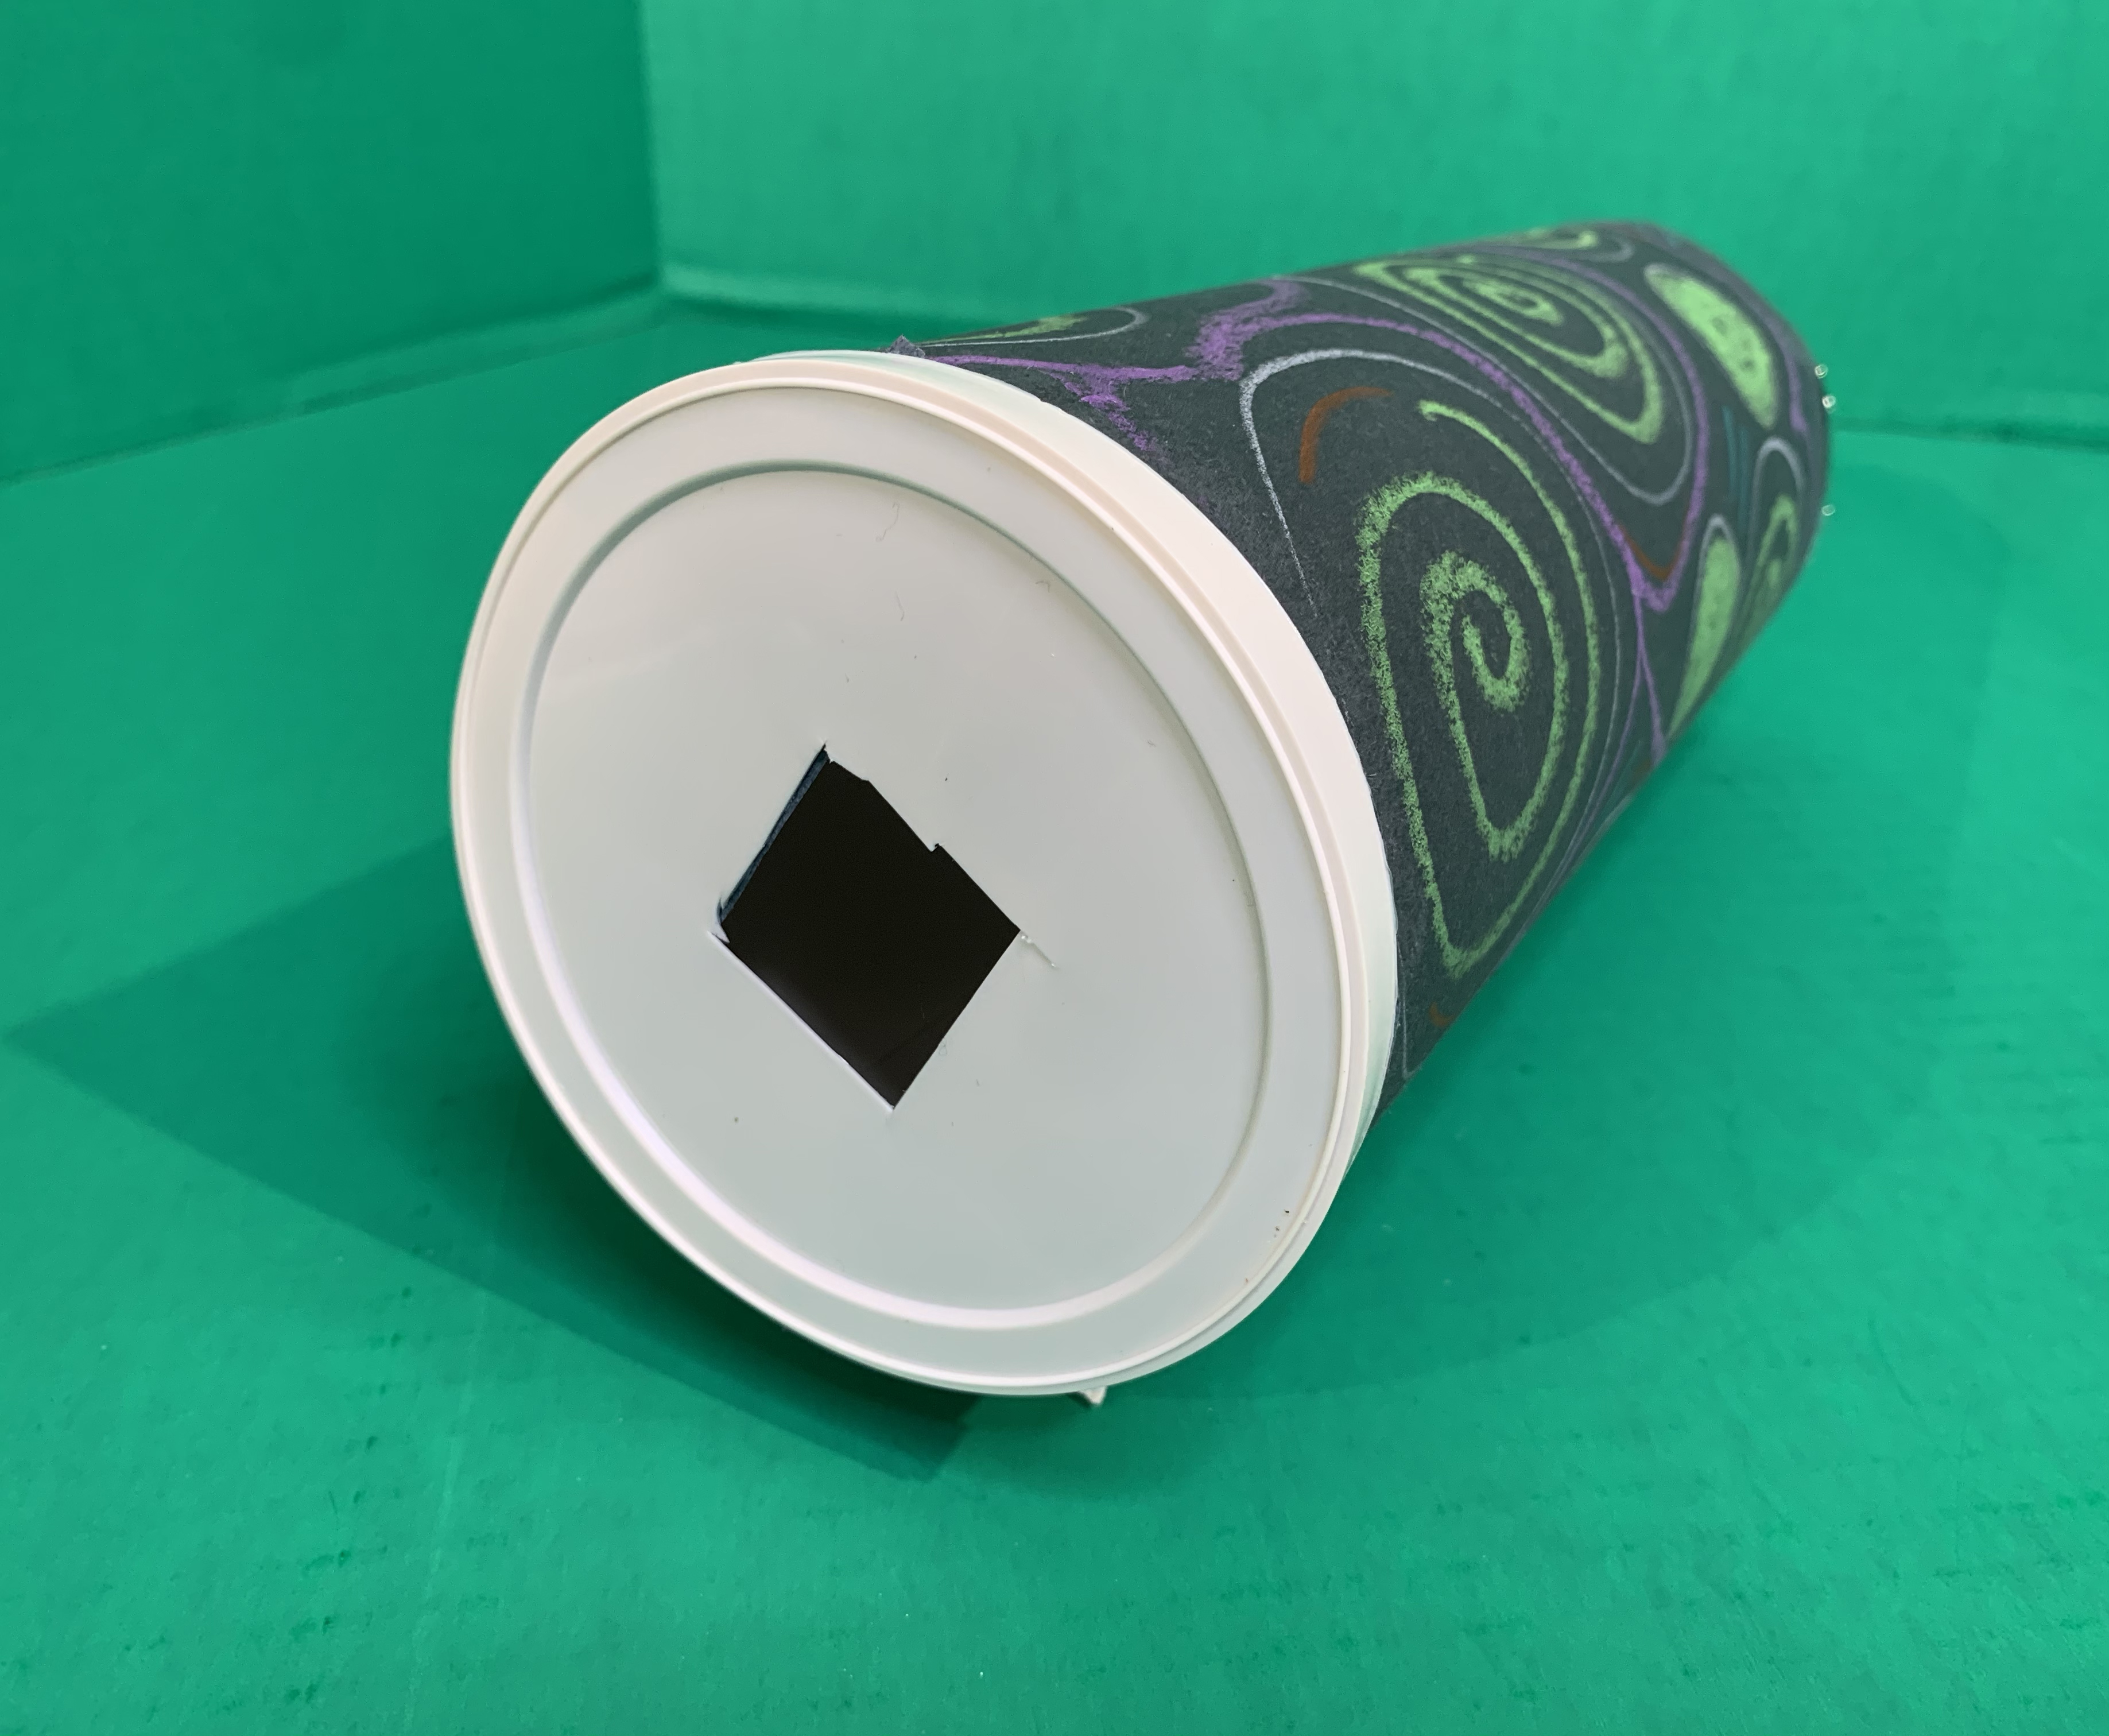
Step 11
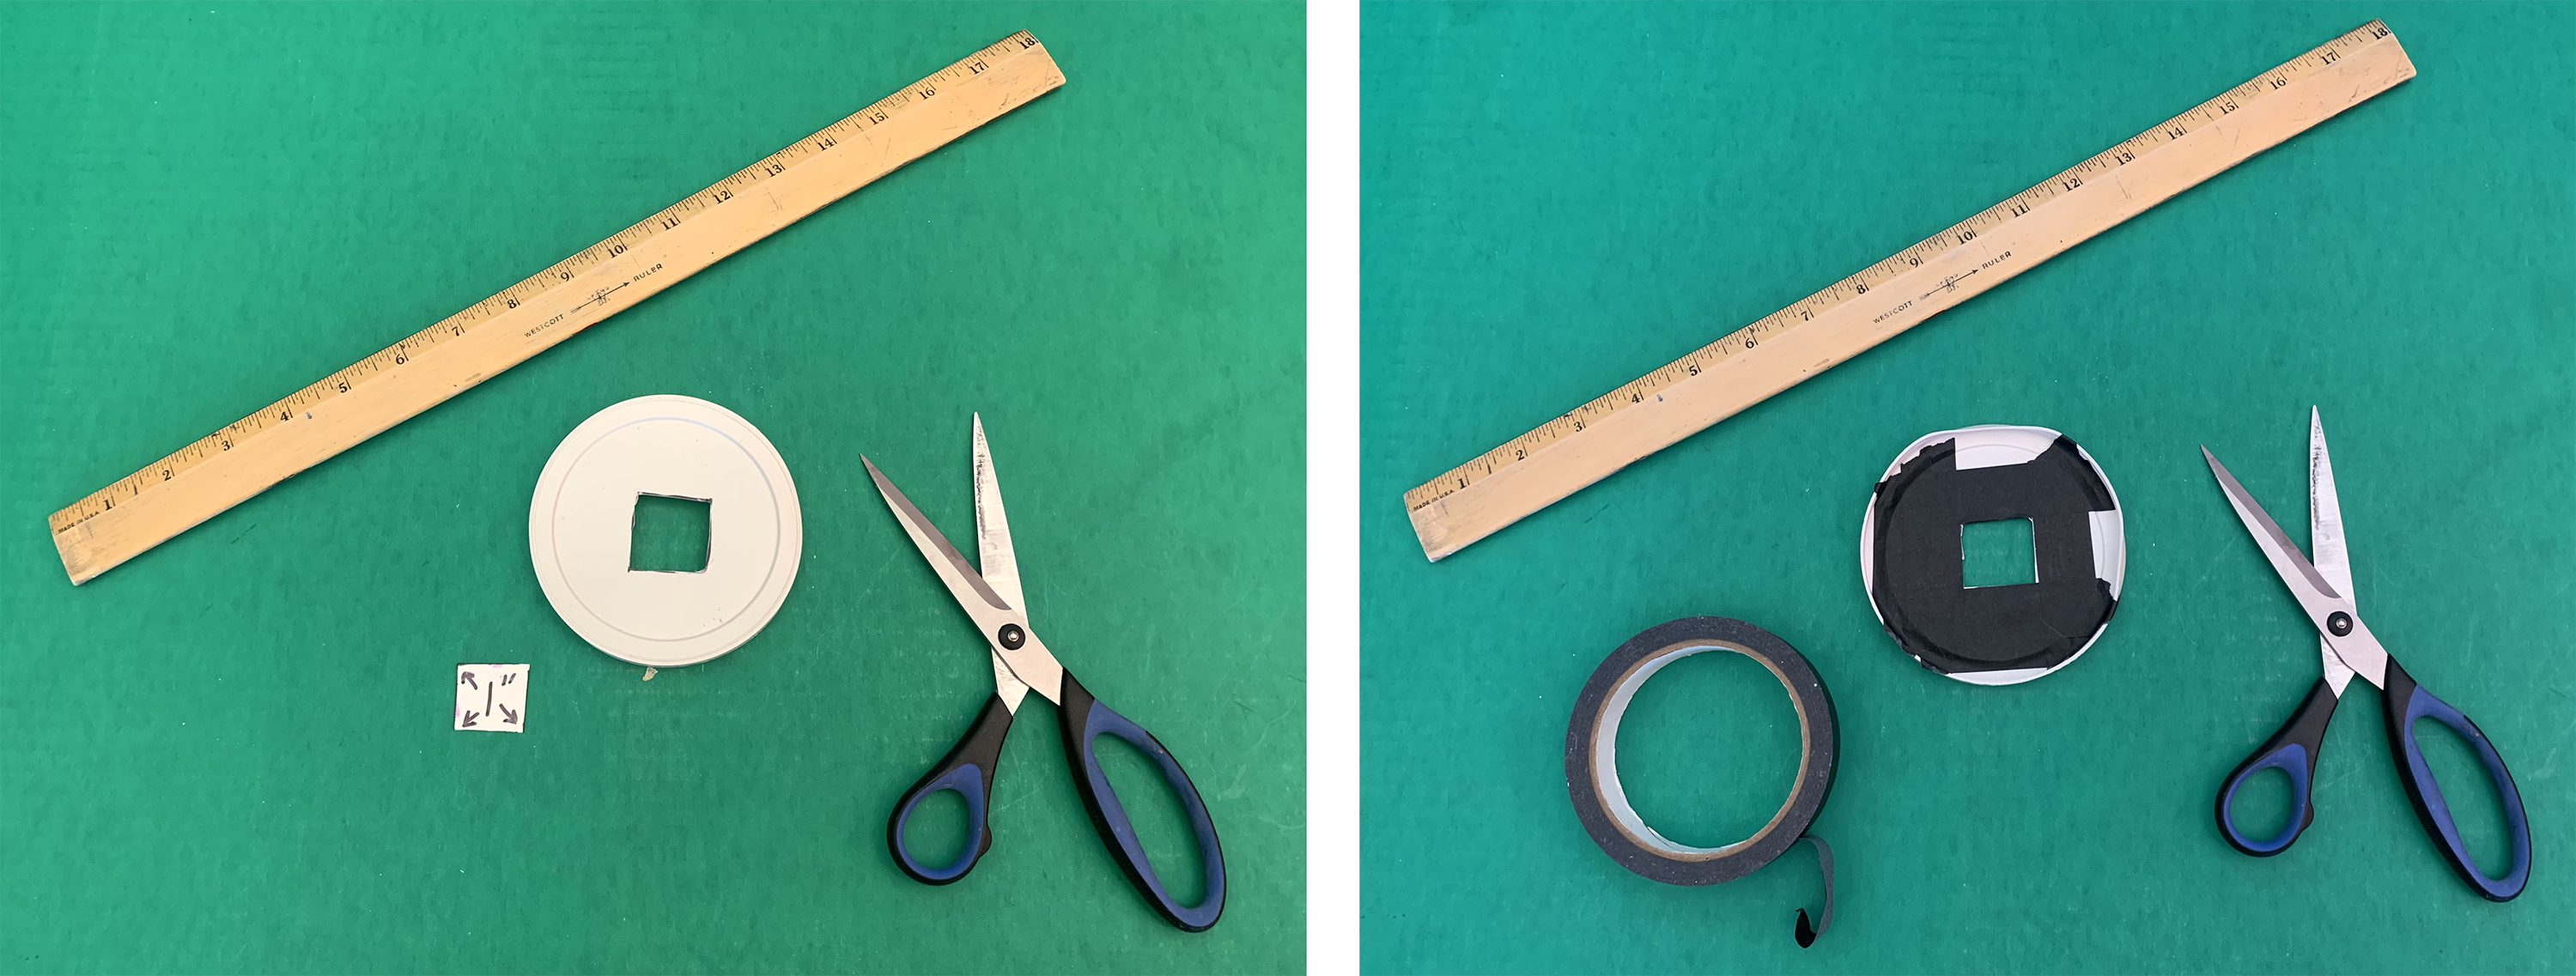
Take the plastic lid and cut a 1 inch square hole in the center. On the inside of the lid, fill in around the square hole with black masking tape. Place the lid back on the open side of the tube.
Last Step
You're now ready to take your camera obscura outside! Make sure it's a sunny day!
Look around and find an object that is interesting to you: maybe a landscape, a park bench, a tree, or a person you know.
Hold your camera obscura up to your eye and focus on your subject. It may take a few tries before your subject comes into view.
Let your eyes adjust and you will see the landscape, bench, person, or object—remember, the image will appear upside down.
If you have a smartphone, you can place your photo lens over the square opening and take a picture of what you see. You might want to have help to take a photo. It can be tricky holding the camera obscura and a smartphone at the same time. Have someone hold the camera obscura for you while you aim the smartphone camera through the square peephole opening.
Congratulations! You now have your own camera obscura—I hope you have as much fun with it as I do!
If you share your artwork on social media, tag us at @lacma! We love seeing your art!
Join us on Sunday, December 27 to learn how to make drawings that capture light and shadows, with artist Eszter Delgado.