
This summer, LACMA launched its YouTube series ART + WORK, which shows the care that museum conservators put into preserving a wide range of artworks from our permanent collection.
In this video, Associate Objects Conservator Abigail Duckor and Getty Marrow Undergraduate Intern Supna Kapoor practice a traditional Japanese ceramic repair technique called kintsugi.
Below, Abigail explains more about the technique and why it is important for early-career conservators to learn.
What is the kintsugi repair process?
The kintsugi repair process is a traditional Japanese method for repairing chipped or broken ceramics. In this method, the mended joins and losses are covered with gold to create a beautiful object that can be used again. In the 16th century, when kintsugi was popular in Japan, it was a way for people to mend their pots instead of throwing them away. We don’t use this method for repairing ceramics in the lab now, but as conservators it is important for us to understand this technique.
It's important in conservation to understand how different objects are made, as this knowledge informs our treatment process. If we have an object that has been traditionally repaired with kintsugi and it's damaged, or it's deteriorating, then we can understand why that deterioration is happening. We can also advise on the best storage conditions for the object to make sure that it doesn't become damaged while it is in the museum collection. Through practicing the kintsugi process, we can better understand how an object has been repaired in this way and why it is important to the history of the object.
I learned this kintsugi process from a kintsugi workshop that I did when I was an intern at the Oxford University Natural History Museum. It was a workshop that was presented by a kintsugi master, who was from a family of kintsugi artisans .
Why do you not regularly perform kintsugi on objects that come into the Conservation lab?
We don't perform kintsugi on the objects because we're not kintsugi masters. It takes a lifetime to become a master at it, so we wouldn't presume to have that knowledge. For most objects in the collection, kintsugi would not be an appropriate method of repair. We aim for our treatments to be reversible and to reflect the original intention of the object.
Supna and I were practicing this technique as part of her internship in the conservation department last summer. As part of Supna’s internship, she worked full time in the conservation lab, learning about conservation and practicing her conservation skills. Working together on this project was a way for me to teach Supna specific skills that will be useful for her as a conservator, as well as a refresher for me! You can see in the video that I was also working on a small bowl to practice alongside Supna. I really valued this time when we got to work together and I learned from the experience too.
Tell me a little about the bowl Supna is using for this practice session.
This bowl is Supna's personal bowl from her own collection and she's using it as a practice object. We did have to smash the bowl to use it. Supna broke the bowl by wrapping it in a towel, placing it all in a plastic bag, and hitting it lightly with a hammer.
This is a high-fire ceramic bowl and they can shatter easily, almost like glass. So she hit it very gently to only make a few fragments, not a thousand. There were still quite a few pieces, which she adhered back together using a reversible adhesive that we use in conservation. She did it segment by segment, making sure that each section was set and secure before going on to the next one. She was careful to not lock out any fragments, which can happen if you do not plan out exactly how the pieces fit together.

What happens next?
After the ceramic fragments were adhered back together, Supna needed to fill any losses to make the bowl shape complete again. When a ceramic is broken, there are small losses along the break edges and larger ones in areas that have shattered completely. Supna filled those losses with a two-part epoxy putty. She smoothed them with water before they hardened., However, further shaping and smoothing was needed after the putty set.
Supna used sandpaper to smooth and shape the fills that she made. She put down blue tape to protect the surface of the ceramic bowl from the sandpaper. It can be difficult to know when the fill is just right. I know from personal experience that sometimes I think a fill is smooth and level, and then it is only when I paint it to match the color of the object, that I realize the fill is incorrect. This is because there is so much more that plays into the fill being correct than just the color. It also has to be the right texture and shape.
One way to know that the fill is the correct shape is by using touch. You can see Supna and I running our fingers along the fill and sometimes that works a lot better than just looking. You can kind of feel with your finger if the fill is above the level of the bowl or if it is a continuous join. We also check if the fills are correct by looking at them with different angles of light.
How do you teach a difficult skill like doing fills?
It is a hard thing to teach because it does take practice to be able to see and feel when a fill is correct. So there's some trial and error in the learning process. However, it is important to get this correct.
If you don’t realize it is incorrect before you go onto the next step—if it is not that smooth, or at the right level or shape—then you have to go back and smooth it again, or remove that inpainting that you've done in order to go a step backwards and smooth and shape it a little bit more.
As an objects conservator, why is it important to get this step right?
As a conservator, you don't want your treatment to distract from the intended aesthetics of the object in most contexts. If you have a fill that is the wrong shape or doesn't match the surrounding substrate of the object, then it's going to be very obvious to the viewer. As conservators, we want the object’s original material and its design to be what the viewer first notices, not our treatment and not what's holding the object together. With further analysis, such as UV illumination or optical microscopy, you can see our intervention. This is intentional, so that it is clear what part of the object is original.
What is the brownish material that Supna is painting over the fills and why is it used?
It’s urushi, a Japanese lacquer that comes from an urushi tree that mainly grows in China, Korea, and Japan. Urushi is made from the sap of the urushi tree and it is actually toxic. It comes from the poison ivy family and irritates the skin and throat of sensitive people. Urushi is more commonly seen in traditional lacquer pieces, like furniture, where it is applied and smoothed in layers. If you have ever seen Chinese or Japanese lacquerware, that is also made with urushi
In the traditional kintsugi process, the urushi would be used as the binder with rice glue to adhere the ceramic fragments together, but since we are kind of doing a quick kintsugi process, we didn't use the urushi as the binder. We mimicked that process by covering the join lines with the urushi which allows us to get the same final look that you would get in the traditional process.
This step is helping Supna practice her painting skills and her hand skills. It's allowing her to create a smooth, free flowing line of the urushi, not to get a jagged line. It's helping her practice using the brush in different ways to get different thicknesses and to get used to using this kind of material.
After Supna applies the layer of urushi along the join edges, the urushi needs to set a little bit and that's done by putting it in a humidification chamber, which is a fancy word for a sealed box that has a damp cotton towel in it. The moisture from the towel will raise the humidity inside the box. We are using the humidification chamber to control the drying of the urushi. Before the urushi has completely dried, we need to apply the brass powder, which is the next step.

Can you explain the technique Supna uses to apply the metallic powder?
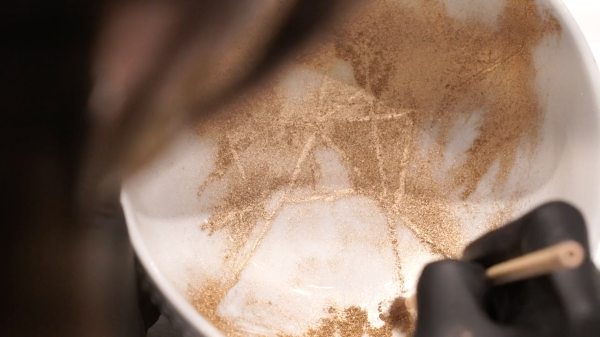
We pick up a small amount of the brass powder by dipping the brush in the bag, and then using a gentle tapping technique, letting the brass powder fall onto the urushi surface. Usually gold powder would be used, but gold powder is much more expensive than brass powder and not necessary for this practice exercise. We tap the brush because the urushi is not fully set yet. You don't want to brush through the urushi and ruin your perfect line. You just want the powder to fall onto the surface.
After you put the metal powder over all your lines of urushi, you need to put it back in the humidification chamber to let the urushi set further. After the powder has settled in the urushi, you can remove the bowl from the humidification chamber and remove the excess powder. It will take another week in the humidification chamber for the urushi to set completely.
Finally, you need to burnish the set urushi and metal powder. Burnishing is a process of rubbing a surface with a smooth tool. It will align all of the metal particles that are set in the surface and it will make the gold or brass glossy and shiny. In this case we just need a little ball of silk wool to burnish the surface of the brass powder, which also picks up stray brass powder residue on the bowl.
This conversation has been edited and condensed for clarity.